bold font italic font
code block
In this section, we’ll start with some basic concepts of web development and then introduce Shiny by explaining the advantages of Shiny and how it works. At least we’ll give a list of useful resources in learning Shiny.

Here are some concepts that usually used in web development.
A static web page (sometimes called a flat page/stationary page) is a web page that is delivered to the user exactly as stored.
Static web page: is delivered to the user exactly as stored.
A server-side dynamic web page is a web page whose construction is controlled by an application server processing server-side scripts.
Dynamic web page: example of server-side scripting (PHP and MySQL).
A Web application (Web app) is an application program that is stored on a remote server and delivered over the Internet through a browser interface.
A Web framework is a collection of packages or modules which allow developers to write Web applications or services without having to handle such low-level details as protocols, sockets or process/thread management.
Front-end web development, also known as client-side development is the practice of producing HTML, CSS and JavaScript for a website or web application so that a user can see and interact with them directly.
Back-end web development,also known as server-side development, creates the logical back-end and core computational logic of a website. It is everything that the users do not see and contains behind-the-scenes activities that occur when performing any action on a website


When the back-end meets the front-end

Taken from ‘Do the evolution’ videoclip by Pearl Jam
“Do The Evolution (1998) is about someone who’s drunk with technology (Eddie Wedder)”
Take the time to watch the video, Do The Evolution so contemporary
Shiny is a web application framework for R that can help turn your analyses into interactive web applications.
No HTML, CSS, or JavaScript knowledge required
Why Shiny?
A Shiny app usually contains two parts:
UI: controls the outlook of the web page
Server: (a live R session) controls the logic

How does Shiny app work?
The “Server” keeps monitoring the UI.
Whenever there is a change in the UI, the “Server” will follow some instructions (run some R code) accordingly and update the UI’s display.
This is the basic idea of reactive expression
Example
#run this example in interactive R sessions
library(shiny)
runExample("01_hello") # a histogram
In the example above, the “Server” keeps monitoring the “slider” in the page, and whenever there is a change with it, the “Server” will re-execute a block of R code to regenerate the histogram.
List of examples
library(shiny)
runExample("01_hello") Shiny portal site: http://shiny.rstudio.com
Tutorial (get started): http://shiny.rstudio.com/tutorial/
Articles (go deeper): http://shiny.rstudio.com/articles/
Gallery (get inspired): http://shiny.rstudio.com/gallery/
Shiny examples (over 100 examples): https://github.com/rstudio/shiny-examples
This is a collection of Shiny examples. You can see them in action on http://gallery.shinyapps.io/example-name where example-name is the directory name of an example here, e.g. https://gallery.shinyapps.io/182-google-charts
Ask questions in the shiny google group: https://groups.google.com/forum/#!forum/shiny-discuss
Articles from R blogger: http://www.r-bloggers.com/?s=shiny
2016 Shiny Developer Conference Videos https://www.rstudio.com/resources/webinars/shiny-developer-conference/

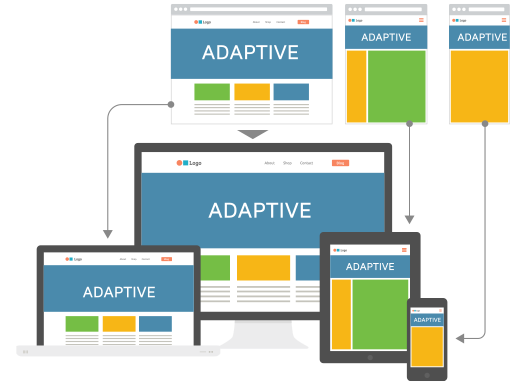
A fluid layout is a type of webpage design in which layout of the page resizes as the window size is changed.
This is accomplished by defining areas of the page using percentages instead of fixed pixel widths.
In Shiny, you express your server logic using reactive programming.
Reactive programming is an powerful programming paradigm, but it can be disorienting at first because it is a very different paradigm to writing a script.
The key idea of reactive programming is to specify a graph of dependencies so that when an input changes, all related outputs are automatically updated.
This makes the flow of an app considerably simpler, but it takes a while to get your head around how it all fits together.
A simple shiny app is a directory containing two
R scripts,
one is ui.R,
which controls the layout and appearance of
your app
the other is server.R, which contains the instructions that your
computer needs to build your app.
Note that the names for the scripts are fixed, you should NOT use other names.
App template
Let’s create a new directory named 01-hello (or whatever
you like) and then create two empty ui.R and
server.R files within it.
Open ui.R with any editor you want and put the following
code in it:
# UI
library(shiny)
fluidPage()
Then copy the following code to server.R. Note that the
server.R contains one single unnamed function.
# SERVER
library(shiny)
function(input, output) {
}
Running the App
To run the app, open an R session and load the
shiny package, then run the runApp function
by
giving the path to the app :
library(shiny)
runApp('01-hello') # or use 'path\\to\\01-hello'
or you can switch the R working directory into the app folder (by
using R command setwd("path/to/01-hello")) and run
library(shiny)
runApp()
After running the app, you’ll get an empty web page.
A single-file shiny app consists of a single file called
app.R which contains both the server and UI components.
library(shiny)

ui <- fluidPage()

server <- function(input, output){}

shinyApp(
  ui = ui,
  server = server
  )
UI is de facto an HTML file.
“HyperText Markup Language (aka HTML) is the standard markup language for Web pages.”
In building ui.R file, what we really do is to
construct an HTML file with R functions.
To see so by typing fluidPage() in the R console and
you’ll see this function returns an HTML div tag
<div class="container-fluid"></div>.
print(fluidPage())## <div class="container-fluid"></div>So of course you can build your entire UI with HTML.
By default, Shiny uses bootstrap (which has nothing to do
with bootstrap method in statistics), the most popular
HTML, CSS, and JS framework for developing responsive, mobile first
projects on the web.

Shiny implemented the layout features available in Bootstrap. You can speed up your development by choosing appropriate layout style.
Panel functions are used to put a group of elements together into a single ‘panel’.
There are several panel functions defined in
shiny:
absolutePanel()
conditionalPanel()
fixedPanel()
headerPanel()
inputPanel()
mainPanel()
navlistPanel()
sidebarPanel()
tabPanel()
tabsetPanel()
titlePanel()
wellPanel()
Most of the panel functions return div tags
with some class attributes defined in Bootstrap. For example, if you
type wellPanel in the R console, you’ll get
<div class="well"></div>, which is the well
class in Bootstrap.
Layout functions are used to organize panels and elements into an existing layout.
There are several layout functions defined in
shiny:
fluidRow(), column() |
based on the bootstrap grid system. Bootstrap’s grid system uses a series of containers, rows, and columns to layout and align content. |
flowLayout() |
lays out elements in a left-to-right, top-to-bottom arrangement |
sidebarLayout() |
Create a layout with a sidebar and main area. (Most commonly used layout. |
splitLayout() |
Lays out elements horizontally, dividing the available horizontal space into equal parts (by default) |
verticalLayout() |
Create a container that includes one or more rows of content. |

Shiny UI layouts
For more details please look at Application layout guide
sidebarLayout is perhaps the most useful layout. We’ll
take it as example here to show the usage of UI layout functions.
See the help document of the sidebarLayout function for
detail: ?sidebarLayout
SidebarLayout
Modify ui.R as follows and run the App again:
library(shiny)
fluidPage(

  titlePanel("Hello Shiny!"),

  sidebarLayout(

    sidebarPanel(HTML('<p>
         <label>A numeric input:</label><br />
         <input type="number" name="n" value="7" min="1" max="30" />
         </p>')),

     mainPanel(
      p(strong("bold font "), em("italic font")),
      p(code("code block")),
      a(href="http://www.google.com", "link to Google"))
  )
)Wigets are web elements that users can interact with.
“A graphical widget (also graphical control element or control)in a graphical user interface is an element of interaction,such as a button or a scroll bar.” Wikipedia
Widgets provide a way for your users to send messages to the Shiny app. Shiny widgets collect values from the user. When a user changes the widget, the value will change as well.
Shiny comes with a family of pre-built widgets, each created with a transparently named R function, which makes the widgets easier to create and look better(using bootstrap style).
The standard Shiny widgets are:
| function | widget |
|---|---|
actionButton |
Action Button |
checkboxGroupInput |
A group of check boxes |
checkboxInput |
A single check box |
dateInput |
A calendar to aid date selection |
dateRangeInput |
A pair of calendars for selecting a date range |
fileInput |
A file upload control wizard |
helpText |
Help text that can be added to an input form |
numericInput |
A field to enter numbers |
radioButtons |
A set of radio buttons |
selectInput |
A box with choices to select from |
sliderInput |
A slider bar |
submitButton |
A submit button |
textInput |
A field to enter text |

Control Widgets
See examples of widgets: http://shiny.rstudio.com/gallery/widget-gallery.html
Each widget function requires several arguments.
The first two arguments for each widget are:
A NAME for the widget to access the widget’s value. The name should be a character string.
A LABEL that will appear with the widget in your app. It should be a character string, but it can be an empty string ““.
The remaining arguments vary from widget to widget, depending on what
the widget needs to do its job. Now let’s improve our example by using
numericInput instead of HTML code.
Widgets
Modify ui.R as follows and run the App again:
library(shiny)
fluidPage(

  titlePanel("Hello Shiny!"),

  sidebarLayout(

    sidebarPanel(
      numericInput("numInput", "A numeric input:", value = 7, min = 1, max = 30)
    ),

    mainPanel(
      p(strong("bold font "), em("italic font")),
      p(code("code block")),
      a(href="http://www.google.com", "link to Google"))
  )
)Server functions take three parameters: input, output, and session.
The input argument is a LIST-like object that contains all the input data sent from the browser, named according to the input ID.
Input objects are read-only.
If you attempt to modify an input inside the server function, you’ll get an error
ui <- fluidPage(
  numericInput("count", label = "Number of values", value = 100)
)


server <- function(input, output, session) {

  ... foo( input$count ) ....

}
Output is a LIST-like object named according to the output ID.
The main difference is that you use it for sending output instead of receiving input.
You always use the output object in concert with a render function
ui <- fluidPage(
  textOutput("greeting")
)

server <- function(input, output, session) {

  output$greeting <- renderText("Hello!")

}
Two steps to do that:
ui.R. That is tell
UIwhere to put the text output (outlook).
server.R. That
is tell the serverhow to render the text (logic).
The render function does two things:
- It sets up a reactive context that automatically tracks what inputs the output uses.
- It converts the output of your R code into HTML suitable for display on a web page.
Shiny will automatically make an object reactive if the object uses an input value.
In the example above, we used textOutput to register a
text output object in ui.R and then used
renderText function to render it.
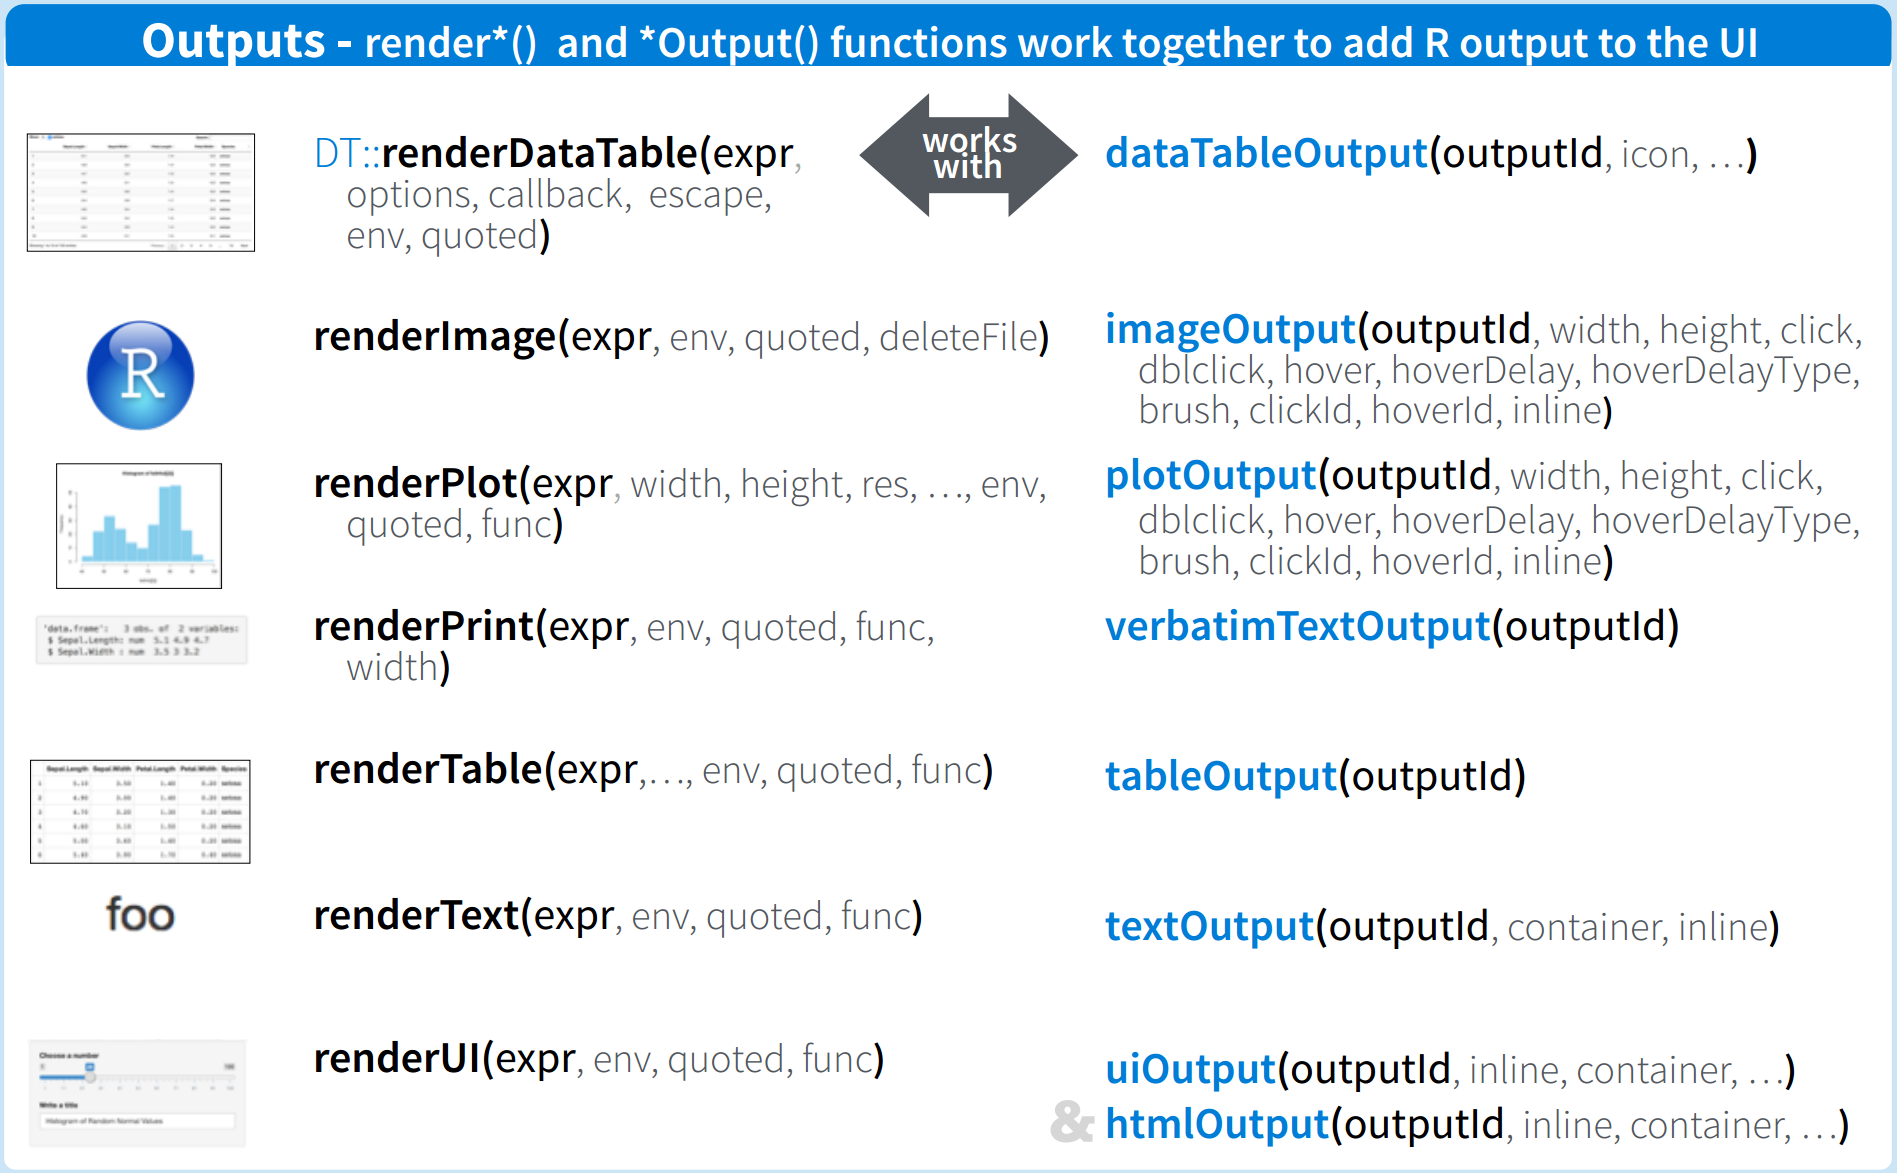
There are many other pairs of *Output and
render* functions defined in Shiny and they work together
to add R output to the UI.
| Output function | render function | creates |
|---|---|---|
htmlOutput/uiOutput |
renderUI |
a Shiny tag object or HTML |
imageOutput |
renderImage |
images (saved as a link to a source file) |
plotOutput |
renderPlot |
plots |
tableOutput |
renderTable |
data frame, matrix, other table like structures |
textOutput |
renderText |
character strings |
verbatimTextOutput |
renderPrint |
any printed output |

An app is going to be pretty boring if it only has inputs or only has outputs. The real magic of Shiny happens when you have an app with both.
Now we want to build our output, which will be updated automatically when an input widget changes.
you don’t need to tell an output when to update, because Shiny automatically figures it out for you.
It’s up to Shiny when (and even if!) the code should be run.
Shiny implements a declarative programming, where you set higher-level goals or constraints, and rely on someone else to decide how and/or when to translate that into action.
To understand the order of execution you need to instead look at the reactive graph
The reactive graph describes how inputs and outputs are connected.

The reactive graph contains one symbol for every input and output, and we connect an input to an output whenever the output accesses the input. This graph tells you that music will need to be recomputed whenever artist is changed. We’ll often describe this relationship as music has a reactive dependency on artist.
For example, we want to build an app with a numeric input in the sidebar panel controls the ‘radius’ of a circle, and a text output in the main panel showing the area of the circle based on the radius input. We want the text output can be updated automatically when the radius value changes.
Modify ui.R as follows. It is saying that I want to put
a text output object in the main panel.
library(shiny)
fluidPage(
  titlePanel("Hello Shiny!"),
  sidebarLayout(

    sidebarPanel(
      numericInput("numInput",
                   "A numeric input:",
                   value = 7, min = 1, max = 30)
    ),

    mainPanel(
      textOutput("txtOutput")
    )
  )
)
Modify server.R as follows. It gives the instruction of
how to calcuate the area of a circle and what text to print.
library(shiny)
function(input, output) {
  # UI: textOutput("txtOutput")
  output$txtOutput = renderText({
    paste0("The area of the circle is: ", pi*input$numInput^2)
  })

}
Now let’s run the app in showcase mode by calling
runApp(display.mode = "showcase").
library(shiny)
runApp("shiny_5", display.mode = "showcase")Popular packages in developing Shiny apps:
| Shiny app | What |
|---|---|
shinydashboard |
to create dashboard like UI |
shinythemes |
makes it easy to alter the overall appearance of your Shiny applications |
shinyjs |
perform common JavaScript operations in Shiny apps using plain R code |
shinyBS |
adds several additional Twitter Boostrap components to shiny. |
shinyFiles |
extends the functionality of shiny by providing an API for client side access to the server file system. |
shinysky |
various UI widgets/components not part of Shiny e.g. alerts, styled buttons |
plotly |
create interactive web-based graphs https://plot.ly/r/shiny-tutorial/ https://plot.ly/r/shiny-gallery/ |
DT |
provides filtering, pagination, sorting, and many other features in the tables |
leaflet |
JavaScript libraries for interactive maps |
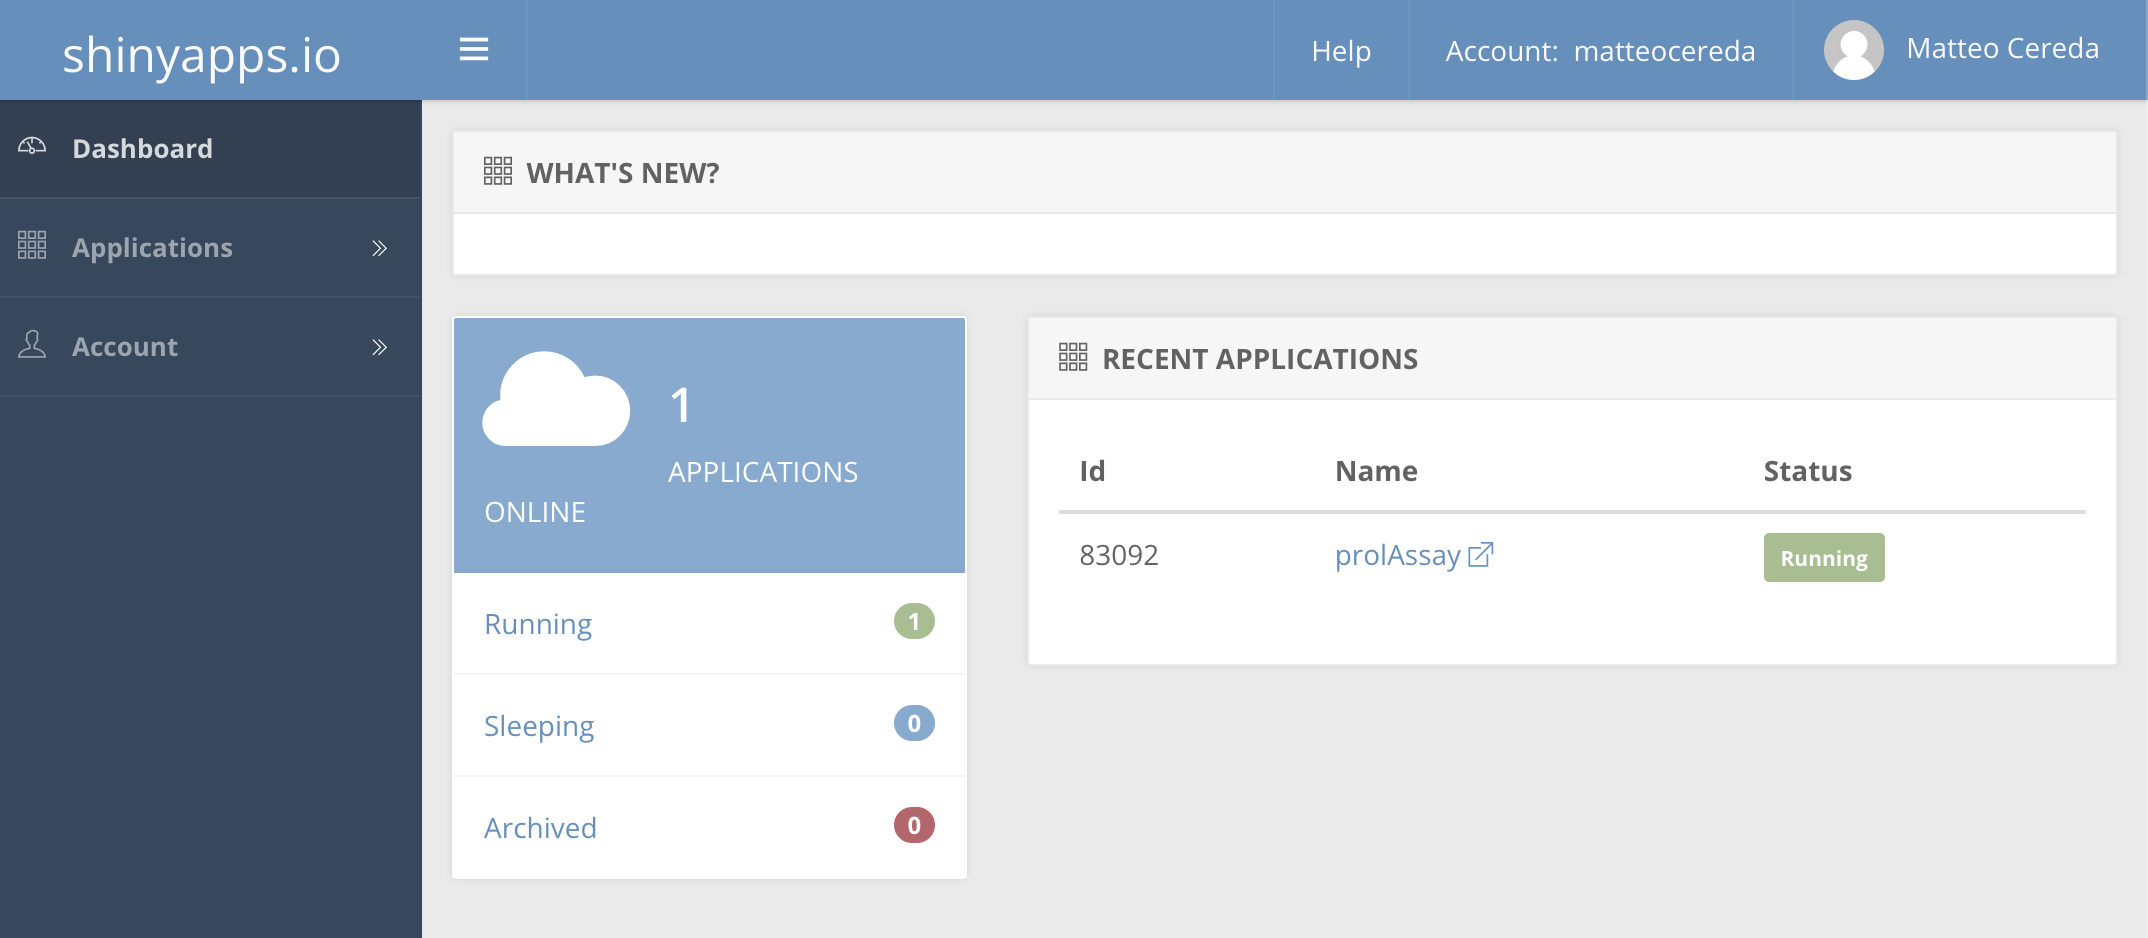
You can publish your apps exploiting the shinyapps.io resource, a RStudio’s hosting service for Shiny apps.
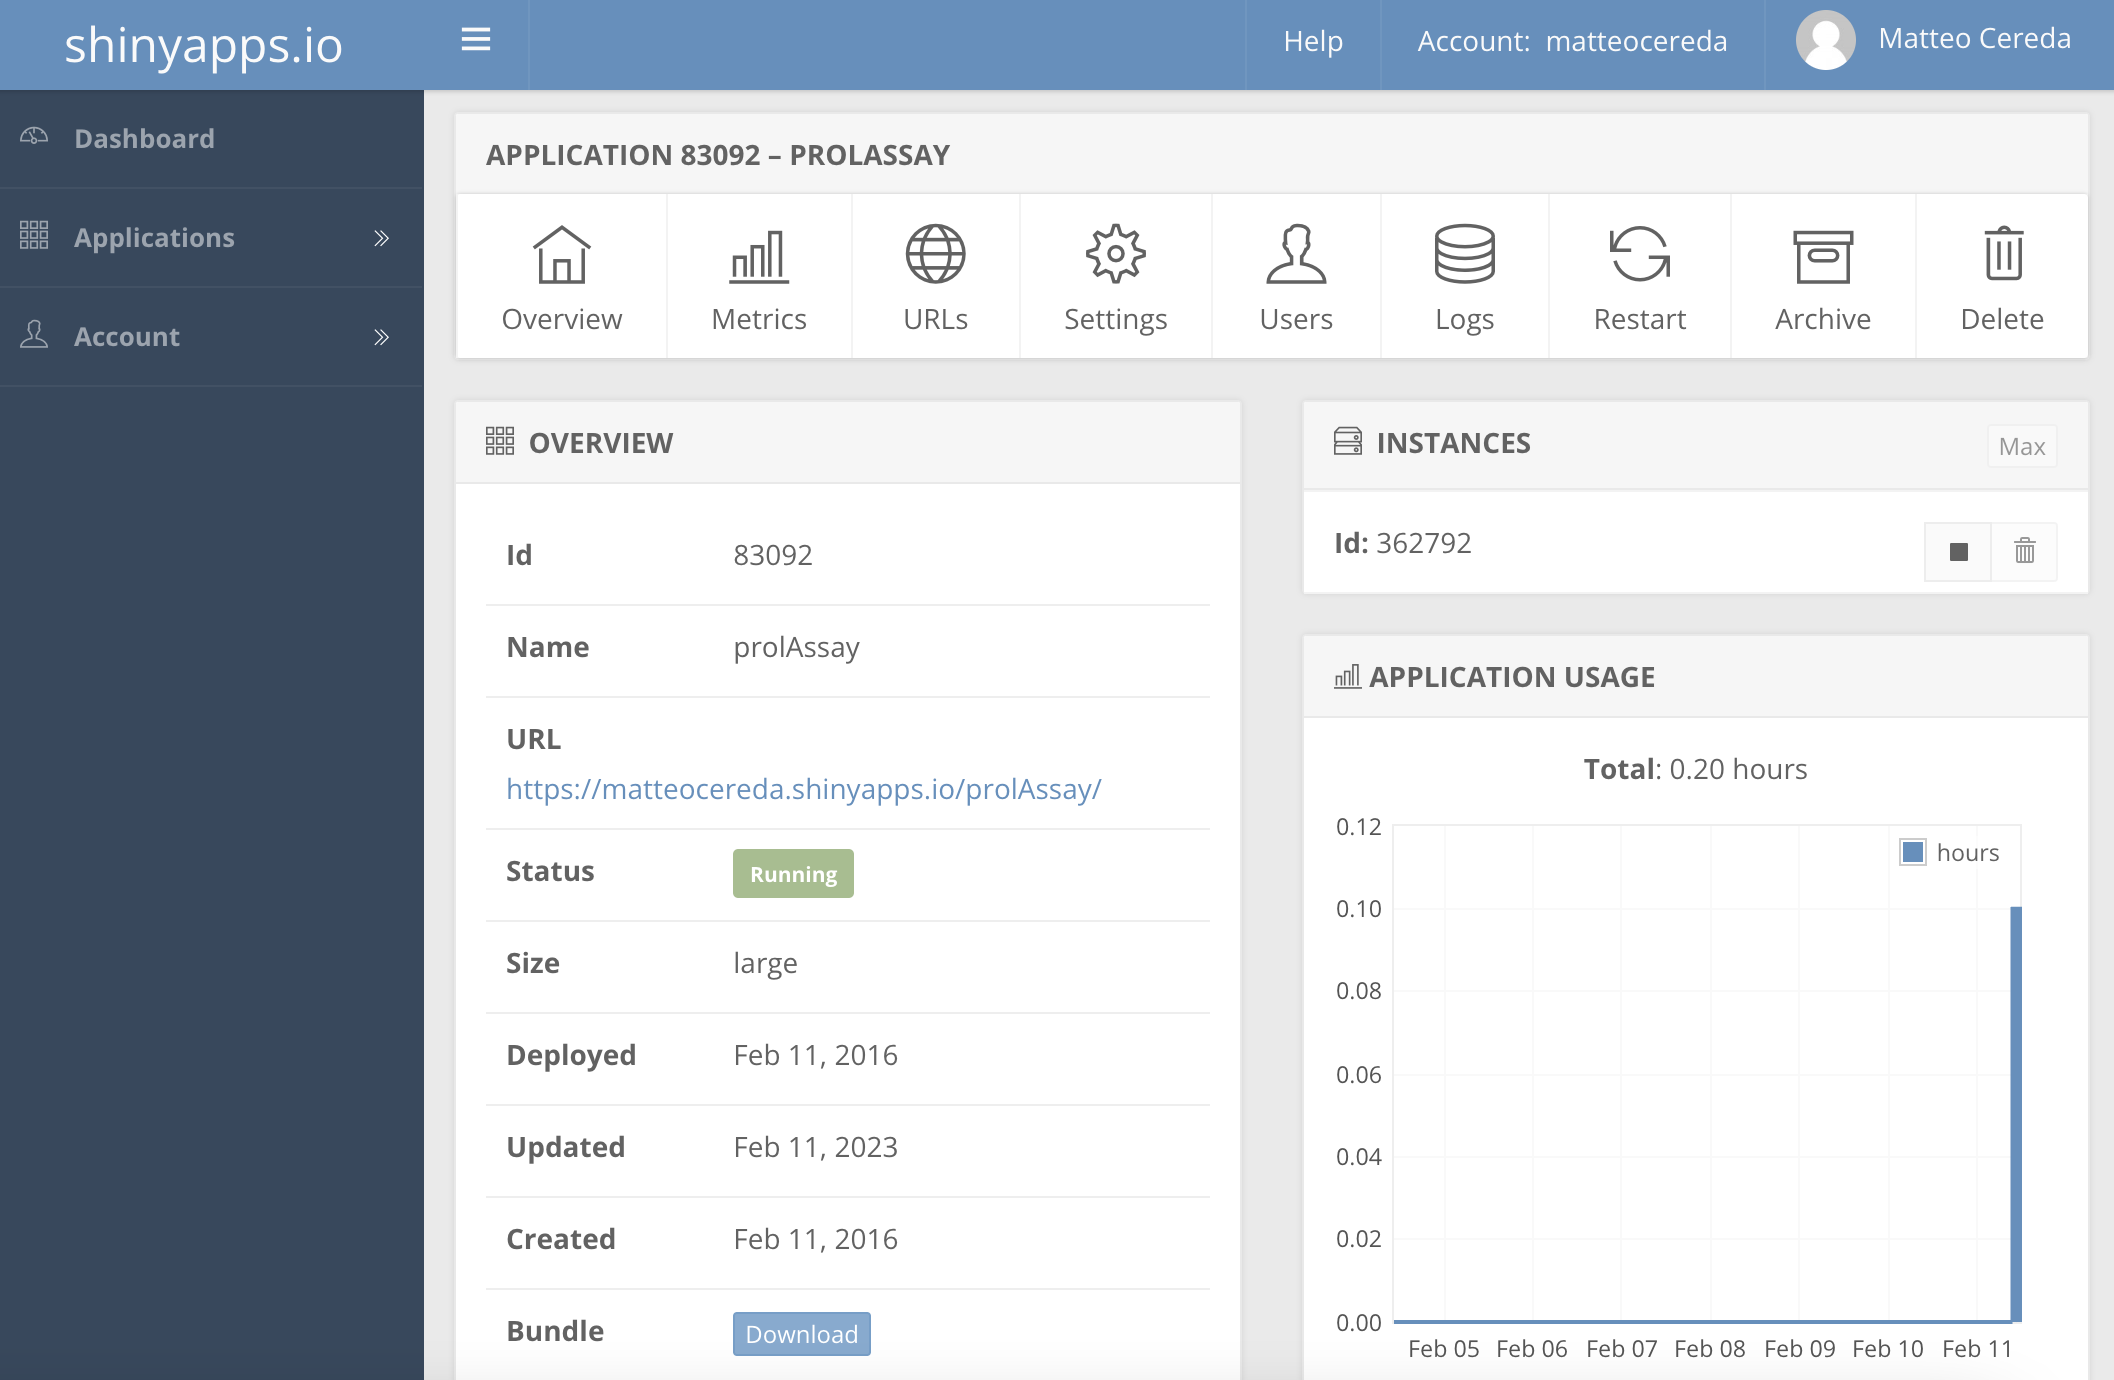
Once logged in and uploaded your scripts, you can control your apps through a control panel.

For each app, you have full access to logs and statistics

A work by Matteo Cereda and Fabio Iannelli